-
Email Address
- Free Consultation
Hosting on Ubuntu Linux 20.04
A Step by Step guide to Publishing multiple Web App on Linux
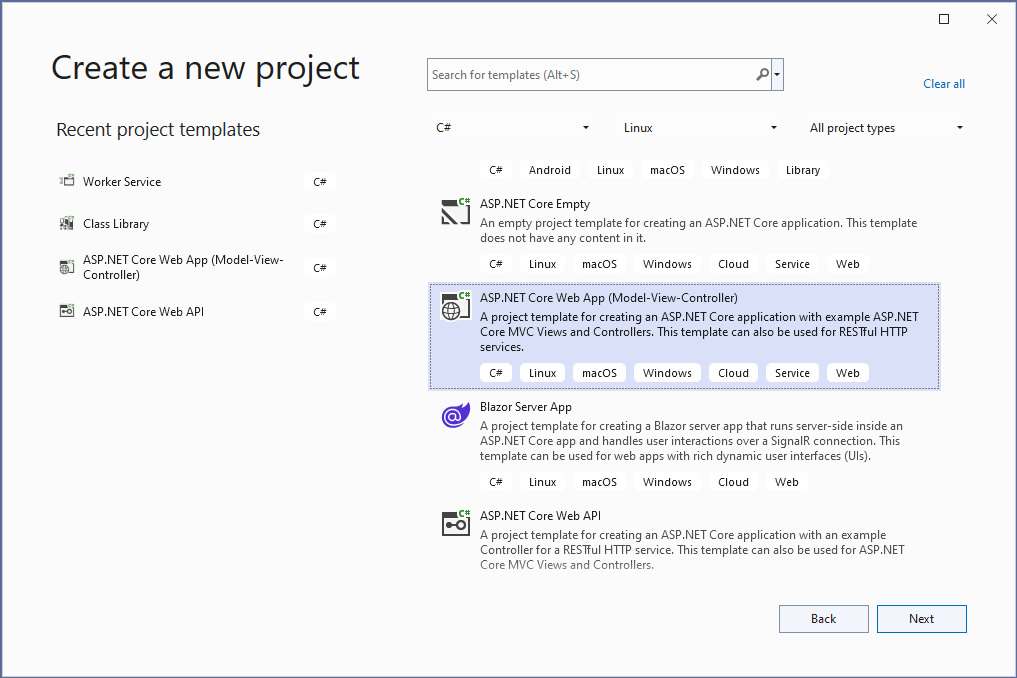
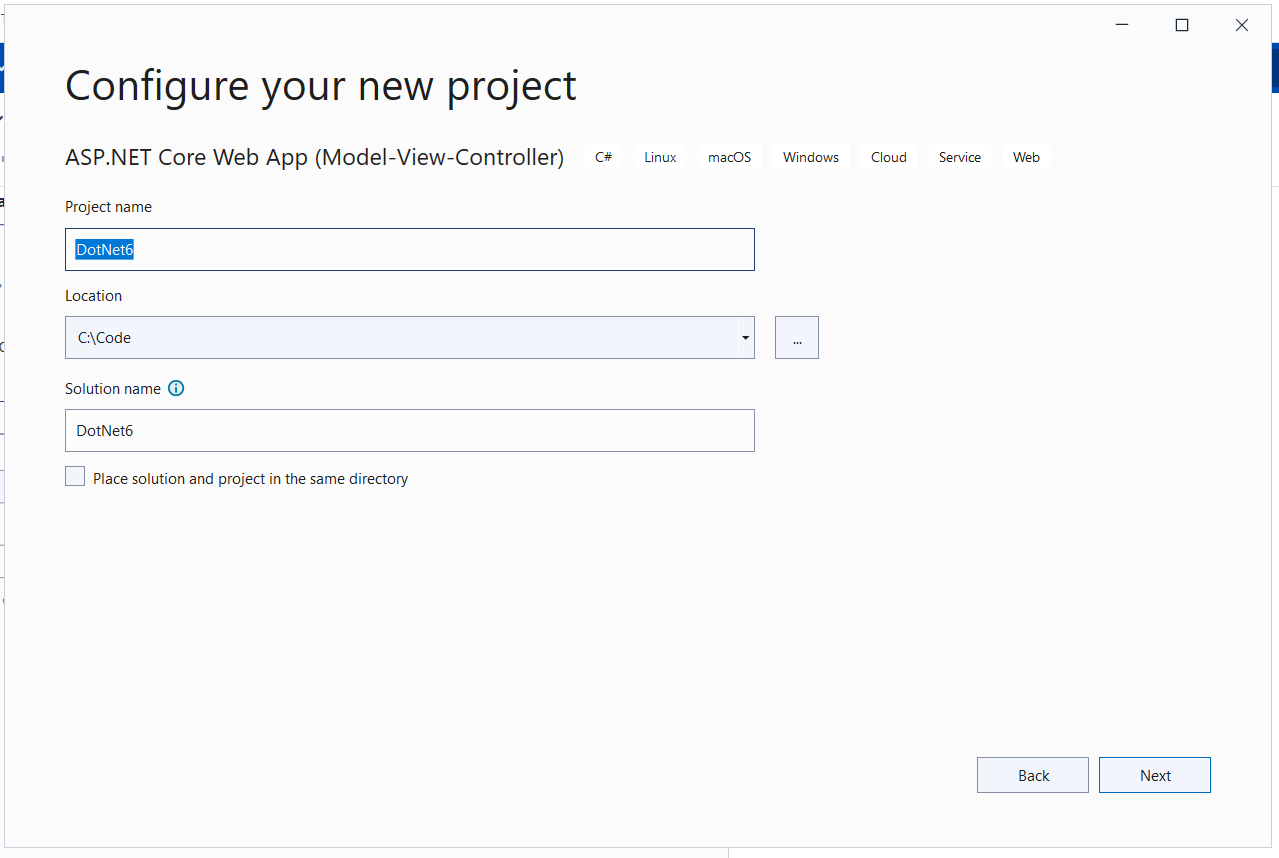
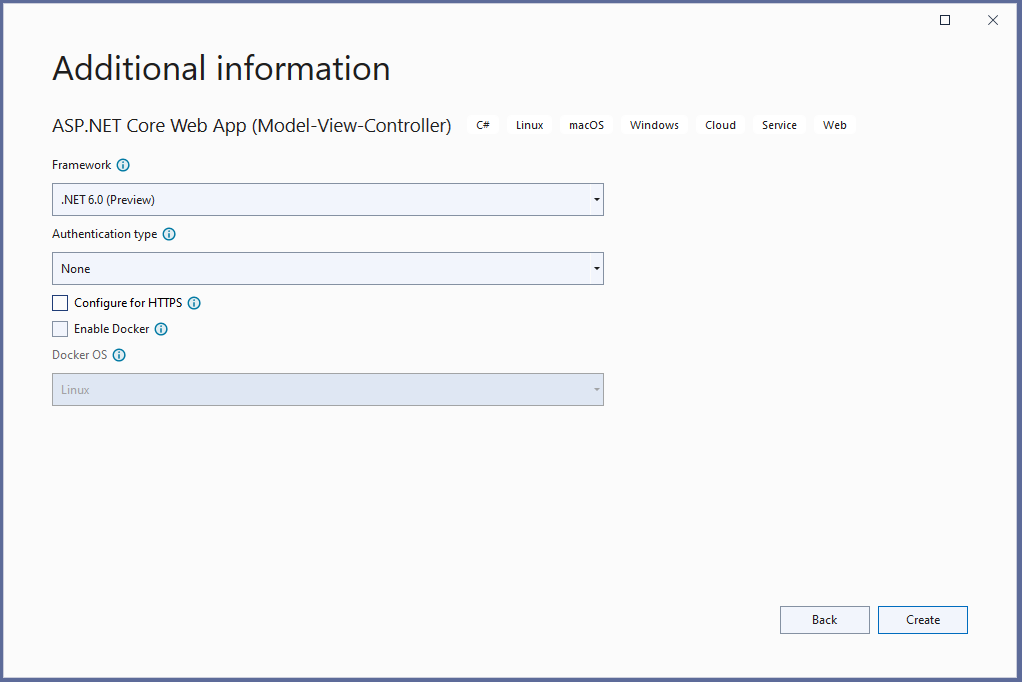
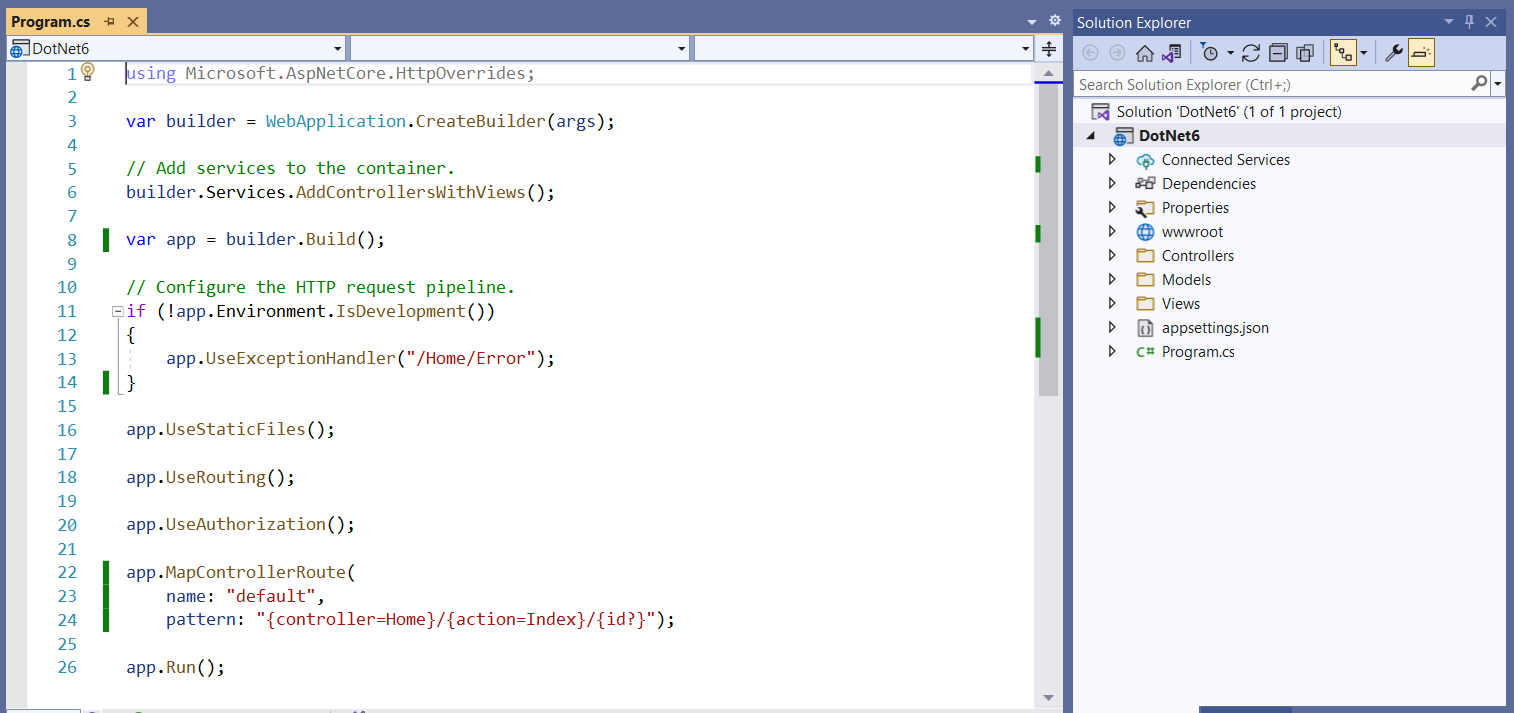
After creating the project next, we are going to make changes in Configure method in the Startup class we are going to add UseForwardedHeaders middleware.
Mainly need to do app.UseForwardedHeaders(); app.UseHttpsRedirection(); and app.UseEndpoints(endpoints =>
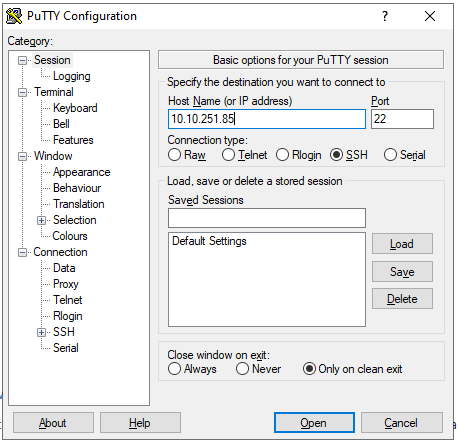
For connecting to Linux Virtual Machine, we are going to use the PuTTY URL for downloading putty https://www.putty.org/
To get a Public IP address to connect to your VM just click on Home Menu from the sidebar then you can Recent resources from that choose recently Create Virtual Machine you will see a similar screen as shown below.
Let’s start PuTTY for connecting to the Virtual Machine. Enter your public IP address in Host Name and Port will be 22 as shown in the above screenshot and click on the Open button to connect.
Enter your username which you have set while creating the Virtual Machine.

And enter a password
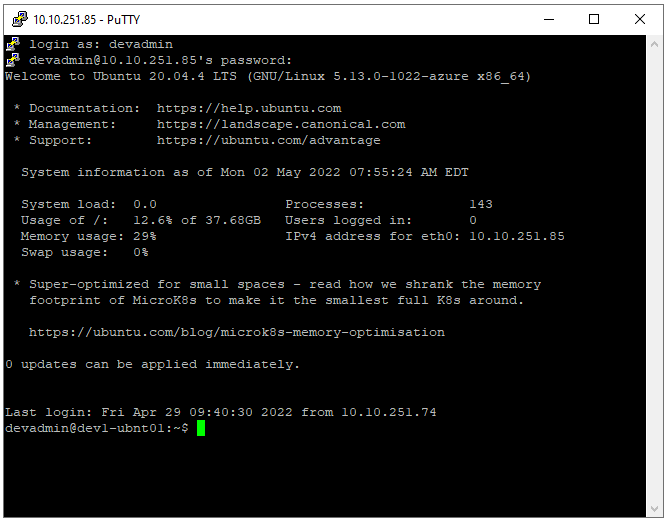
After connecting the terminal, we are going to run some installation in it.
We are going to run this command in the terminal.
wget https://packages.microsoft.com/config/ubuntu/20.04/packages-microsoft-prod.deb -O packages-microsoft-prod.deb
sudo dpkg -i packages-microsoft-prod.deb
rm packages-microsoft-prod.deb
In this step we are going to Install .NET Core Runtime allows you to run apps that were made with .NET 6.0.
Install the SDK
sudo apt-get update; \
sudo apt-get install -y apt-transport-https && \
sudo apt-get update && \
sudo apt-get install -y dotnet-sdk-6.0
Install the runtime
sudo apt-get update; \
sudo apt-get install -y apt-transport-https && \
sudo apt-get update && \
sudo apt-get install -y aspnetcore-runtime-6.0
Publish application on local (windows) IIS.

Publish Files
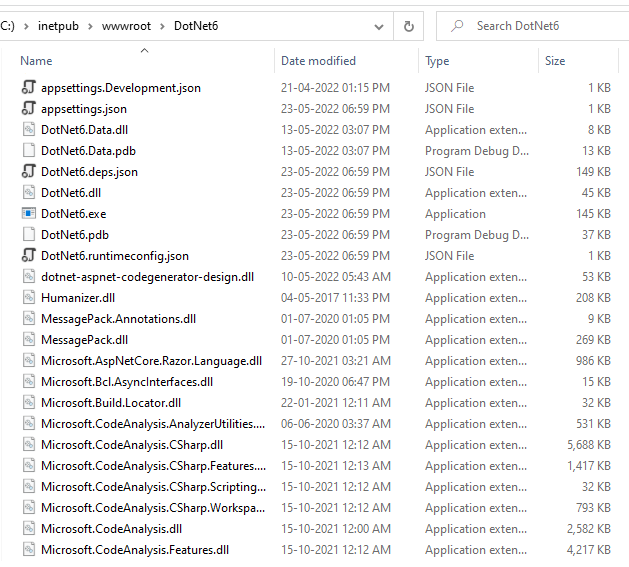
After publishing, we need to copy files to Linux Machine for doing that we are going to use WinSCP tool.
In this step, we are going to copy that folder to Linux Virtual Machine for doing that we are going to use WinSCP. URL to Download WinSCP: – https://winscp.net/eng/index.php
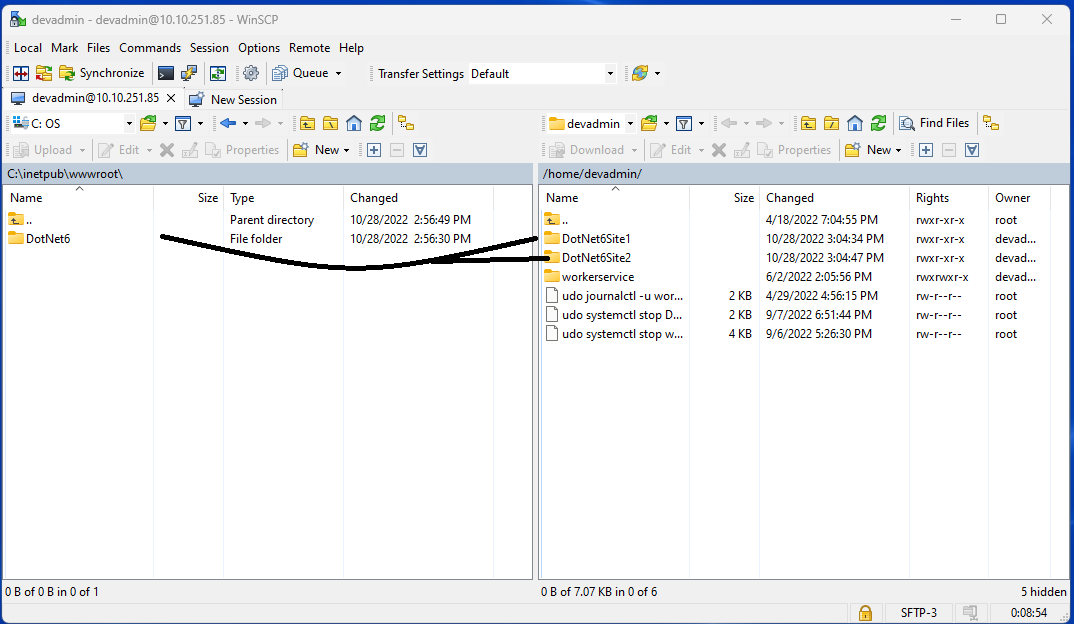
Note:- Site1 and Site2 have two label changes only on the Home page, except both codes are the same.
In this step, we are going to install the Apache webserver.
sudo apt install apache2
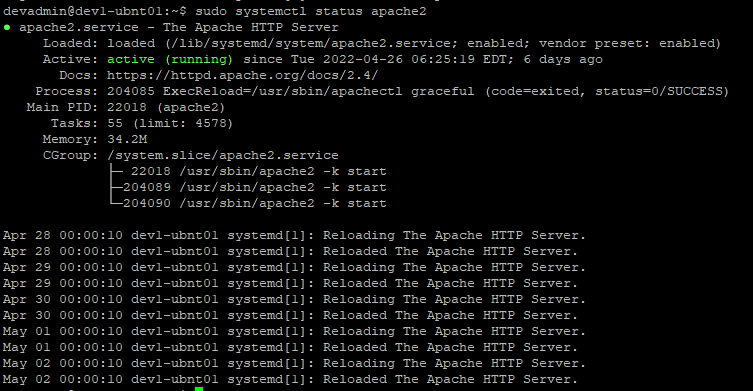
Next, we have installed Apache now we can check the Apache webserver status is it running.
sudo systemctl status apache2
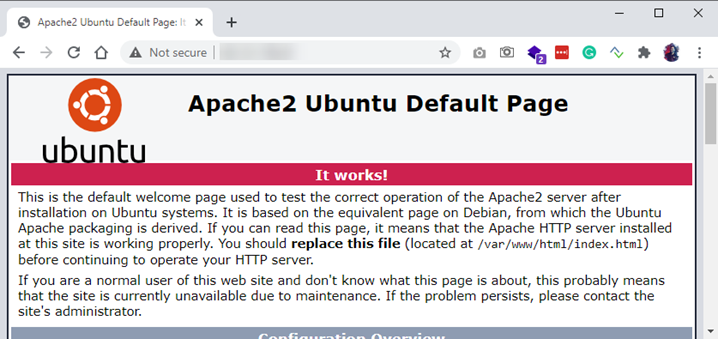
To test in the browser, just access from Public IP. It will show you the default Apache web page as shown below.
sudo a2enmod rewrite
sudo a2enmod proxy
sudo a2enmod proxy_http
sudo a2enmod headers
sudo a2enmod ssl
Run each command one by one. After Enabling modules, the Apache server needs to restart.
Here we are going to restart the Apache server after Enabling Modules in the last step.
sudo service apache2 restart
In step 11 we have copied files to /home/devadmin/DotNet6Site1/ folder now we are going copy those files to /var/www/dotnet6/s1.dotnet6.com/ folder and copying /home/devadmin/DotNet6Site2 folder to /var/www/dotnet6/s2.dotnet6.com/ folder. Before copying, we are going to create a folder.
sudo mkdir -p /var/www/dotnet6/s1.dotnet6.com/
sudo mkdir -p /var/www/dotnet6/s2.dotnet6.com/
mkdir -p command
With the help of mkdir -p command, you can create subdirectories of a directory. It will create a parent directory first if it doesn’t exist. But if it already exists, then it will not print an error message and will move further to create sub-directories. https://www.javatpoint.com/linux-mkdir-p
Copy files to the newly created folder /var/www/dotnet6/s1.dotnet.com and /var/www/dotnet6/s2.dotnet6.com folder.
sudo cp -r /var/www/DotNet6Site1/*.* /var/www/dotnet6/s1.dotnet6.com
sudo cp -r /var/www/DotNet6Site2/*.* /var/www/dotnet6/s2.dotnet6.com
You can view this folder using WinSCP tool and navigate to /var/www/dotnet6/s1.dotnet6.com/ and /var/www/dotnet6/s2.dotnet6.com/
cp -r command
Option ‘r’ with the copy command can be used to copy a directory including all its content from a source directory to the destination directory. https://www.javatpoint.com/linux-cp-r
Apache Virtual Host Configuration are located in /etc/apache2/sites-available
I am going to name the Virtual Host Configuration file s1.dotnet6.com.conf many people give the domain name to the Configuration file for easy to recognize.
sudo nano /etc/apache2/sites-available/s1.dotnet6.com.conf
<VirtualHost *:80>
ServerAdmin admin@s1.dotnet6.com
ServerName s1.dotnet6.com
DocumentRoot /var/www/dotnet6/s1.dotnet6.com
ProxyPreserveHost On
ProxyPass / http://127.0.0.1:5000/
ProxyPassReverse / http://127.0.0.1:5000/
ErrorLog ${APACHE_LOG_DIR}/s1.dotnet6.com_error.log
CustomLog ${APACHE_LOG_DIR}/s1.dotnet6.com_access.log combined
<VirtualHost>
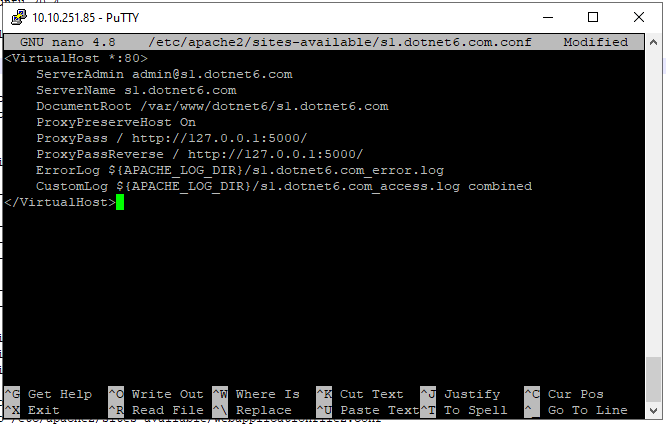
After adding this content just save the file by pressing Crtl + S. Then press Ctrl + x to jump back from this window and back to a terminal window.
Please take care of DocumentRoot, ProxyPass, and ProxyPassreverse parameters are most important in a configuration file.
Apache Virtual Host configuration are located in /etc/apache2/sites-available
I am going to name the Virtual Host Configuration file s2.dotnet6.com.conf many people give the domain name to the Configuration file for easy to recognize.
sudo nano /etc/apache2/sites-available/s2.dotnet6.com.conf
<VirtualHost *:80>
ServerAdmin admin@s2.dotnet6.com
ServerName s2.dotnet6.com
DocumentRoot /var/www/dotnet6/s2.dotnet6.com
ProxyPreserveHost On
ProxyPass / http://127.0.0.1:5001/
ProxyPassReverse / http://127.0.0.1:5001/
ErrorLog ${APACHE_LOG_DIR}/s2.dotnet6.com_error.log
CustomLog ${APACHE_LOG_DIR}/s2.dotnet6.com_access.log combined
<VirtualHost>
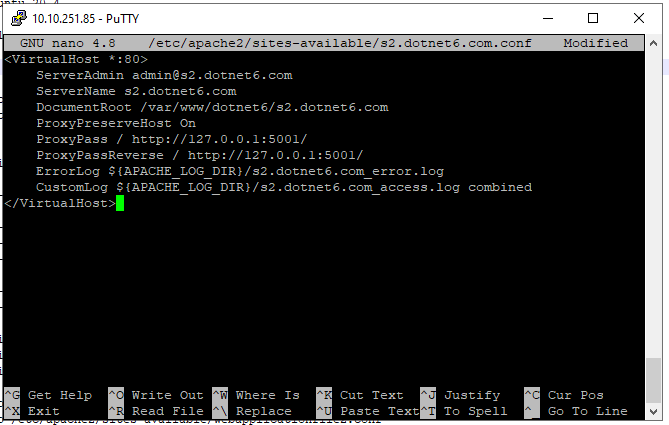
After adding this content just save the file by pressing Crtl + S. Then press Ctrl + x to jump back from this window and back to a terminal window.
Please take care of DocumentRoot, ProxyPass, and ProxyPassreverse parameters are most important in a configuration file.
sudo a2dissite 000-default.conf
After disabling the site next defined in 000-default.conf file next, we are going to activate the current configured virtual host configuration file.
Here we are going to enable s1.dotnet6.com.conf file.
sudo a2ensite s1.dotnet6.com.conf
Here we are going to enable s2.dotnet6.com.conf file.
sudo a2ensite s2.dotnet6.com.conf
sudo apachectl configtest
If the message of the terminal is Syntax OK then your configuration file is proper.

sudo systemctl restart apache2
Creating a systemd Service file with the name s1.dotnet6.com.service
sudo nano /etc/systemd/system/s1.dotnet6.com.service
Paste the following contents into the service file.
[Unit]
Description=Running Net 6.0 s1.dotnet6.com on Ubuntu 20.04 Webserver APACHE
[Service]
WorkingDirectory=/var/www/dotnet6/s1.dotnet6.com
ExecStart=/usr/bin/dotnet /var/www/dotnet6/s1.dotnet6.com/DotNet6.dll
Restart=always
# Restart service after 10 seconds if the dotnet service crashes
RestartSec=10
KillSignal=SIGINT
SyslogIdentifier=dotnet-example
User=www-data
Environment=ASPNETCORE_ENVIRONMENT=Production
Environment=DOTNET_PRINT_TELEMETRY_MESSAGE=false
[Install]
WantedBy=multi-user.target
WorkingDirectory= defines in which directory the service will be launched. This my application publish folder /var/www/dotnet6/s1.dotnet6.com
ExecStart= allows you to specify any command that you’d like to run when this service is started.
Save this file by pressing Ctrl + s.
Creating a systemd Service file with the name s2.dotnet6.com.service
sudo nano /etc/systemd/system/s2.dotnet6.com.service
Paste the following contents into the service file.
[Unit]
Description=Running Net 6.0 s2.dotnet6.com on Ubuntu 20.04 Webserver APACHE
[Service]
WorkingDirectory=/var/www/dotnet6/s2.dotnet6.com
ExecStart=/usr/bin/dotnet /var/www/dotnet6/s2.dotnet6.com/DotNet6.dll
Restart=always
# Restart service after 10 seconds if the dotnet service crashes
RestartSec=10
KillSignal=SIGINT
SyslogIdentifier=dotnet-example
User=www-data
Environment=ASPNETCORE_ENVIRONMENT=Production
Environment=DOTNET_PRINT_TELEMETRY_MESSAGE=false
Environment=ASPNETCORE_URLS=http://127.0.0.1:5001
[Install]
WantedBy=multi-user.target
WorkingDirectory= defines in which directory the service will be launched. This my application publish folder /var/www/dotnet6/s2.dotnet6.com
ExecStart= allows you to specify any command that you’d like to run when this service is started.
Save this file by pressing Ctrl + s.
Please take care of the last Environment parameter that is most important in the service file.
sudo systemctl enable s1.dotnet6.com.service
sudo systemctl enable s2.dotnet6.com.service
sudo systemctl start s1.dotnet6.com.service
sudo systemctl start s2.dotnet6.com.service
In Windows the hosts file is located at C:\Windows\System32\Drivers\etc\hosts. Right-click on Notepad in your start menu and select “Run as Administrator”. This is crucial to ensure you can make the required changes to the file.
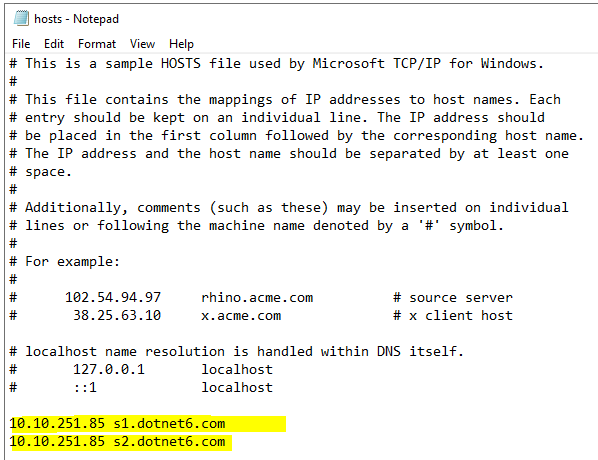
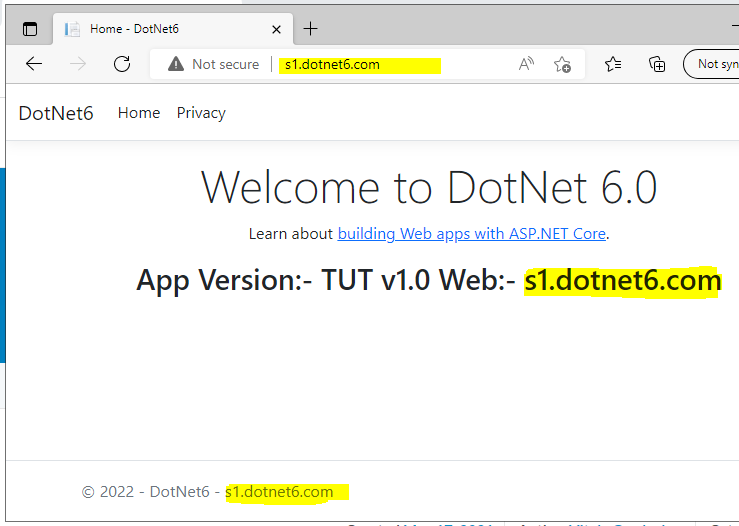
Site1 is accessible from s1.dotnet6.com
And Site2 is accessible from s2.dotnet6.com
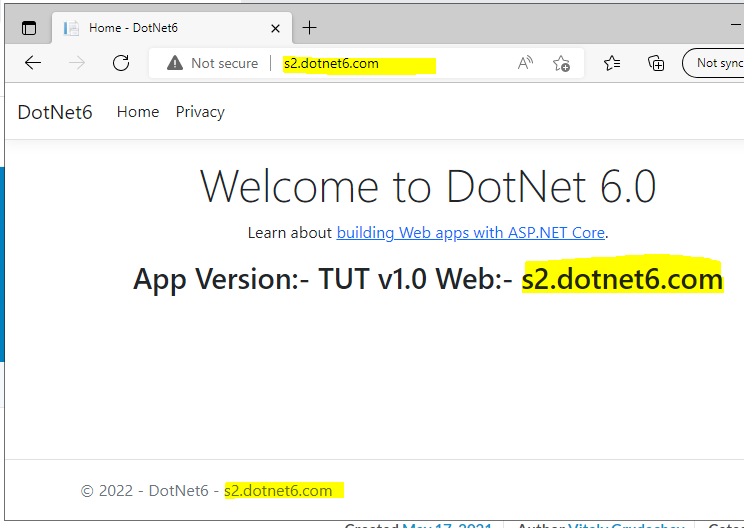
Your .Net 6.0 Web Apps is successfully hosted on Single Apache in Linux Ubuntu 20.04 and the web apps are up & running.
All this setup and configuration is credited to these articles https://www.servermania.com/kb/articles/host-multiple-websites-one-server/ and https://www.syncfusion.com/blogs/post/hosting-multiple-asp-net-core-apps-in-ubuntu-linux-server-using-apache.aspx